
KeePass Desktop Installation
Introduction
I’ve been meaning to start using a password manager for ages. As I’m documenting how I’m getting on it makes sense to also outline the installation of KeyPass.
Download
As I’m starting afresh with no existing database, I went for version 2.X as it offers a better feature set.
I also opted for the portable version version. This is purely a personal choice - I prefer to limit what’s installed on my machine if I can. I’m sure the full installation will work in much the same way.
Setup
Once downloaded, copy the portable version to your tools folder, or desktop - basically where you want it to be. Setup is a cinch:
- Open the KeePass.exe (version 2.X) executable in Windows Explorer
- Select File > New to create a new password database
- Save the database somewhere sensible
I chose to save mine in my Dropbox folder, as I’ll be looking to sync the password database to a smartphone later. - Once saved, you’ll be prompted to set-up your Master password
Before entering your Master password, stop for a moment and think of a strong passphrase. You’ve become used to using a short 8 character password with websites. Your Master password opens all the doors to all your data. Not just one, all of them; Your e-mail, your ebay account, your bank … everything.
Alongside the Master password, additional security elements can be used … but should you?
-
Key file
Useful, but how would you securely store it? On an encrypted USB thumb drive? Possibly, but then you need a password to open it … see where I’m going
-
Windows User Account
You can also tie your installation to your username on your Windows machine if you prefer the extra security. However I would advise against it:- Should your Windows machine ever die, or a hard disk dies you can no longer access your password database. This can be mitigated with a good backup strategy - which you have, don’t you?

- This limits you to just the one computer, so forget about using the password manager on your phone.
- Should your Windows machine ever die, or a hard disk dies you can no longer access your password database. This can be mitigated with a good backup strategy - which you have, don’t you?
If it helps, I went with the Master password option only. I think the default Database settings are fine, just click OK.
Recommended Options
With our database setup and ready for syncing there are a couple of settings I would recommend changing. Open the Settings from Tools > Options:
-
Security
- Tick Lock workspace after KeePass inactivity which I set to 300 seconds (5 minutes)
-
Integration
- Click Create Association - then when you double-click on your database file in Windows Explorer, KeePass will open.
- Tick Run KeePass at Windows startup
-
Policy
- Untick the Export - No Key Repeat option - this prompts for the Master password before exporting your passwords. So if you leave your PC unattended someone can’t just quickly export all your passwords.
- Untick the Print - No Key Repeat option - again for the same reasons
- Untick Change Master Key - No Key Repeat - ensures you have to enter the current Master password before the current password can be changed
Usage
Once you’ve setup your Master password you’re prompted with the main KeePass screen:
 The left hand pane shows categories for various online services, internet sites, eMail services, etc. You can add further groups as you gain more familiarity with the tool.
The right hand side shows website in the current category; all straight-forward stuff.
In the remainder of this article I'll only show keyboard shortcuts to access relevant features. KeePass does allow everything to be selected with the mouse, however I solemnly believe using the keyboard is the most productive means of using the manager, and therein the best way to encourage its adoption in the long term – which is in your best interests dear reader ![]() .
.
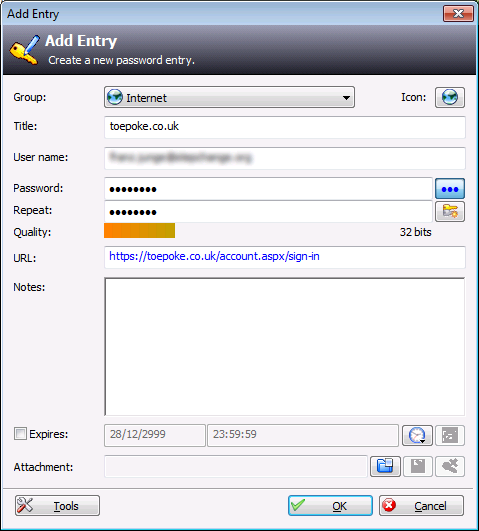
Adding entries
I’m going to add an entry to our favourite website for organising football ![]()
- Select Internet on the left hand side pane
- Hit CTRL+Y to Add Entry
- Fill in the appropriate details
- By default KeePass will generate a random password for you (click the 3 dots to see what’s been generated)
- Some websites are choosy about what passwords can be used – click the Generate a random password button to apply the rules the website expects.
- Click OK
- Hit CTRL+S to save to the KeePass secure database
Logging into websites
A vital part to the success of a password manager is how easy is it to use in the real-world, i.e. logging into websites. And as with many things in life, the answer is … it depends. It depends on the website and if it’s built in such a way that KeePass can inject itself easily.
Simple
The simplest method is via the Auto-Type feature. This is the preferred method, but sadly doesn’t work with all websites. I’ve added an entry for the bbc website in this instance.
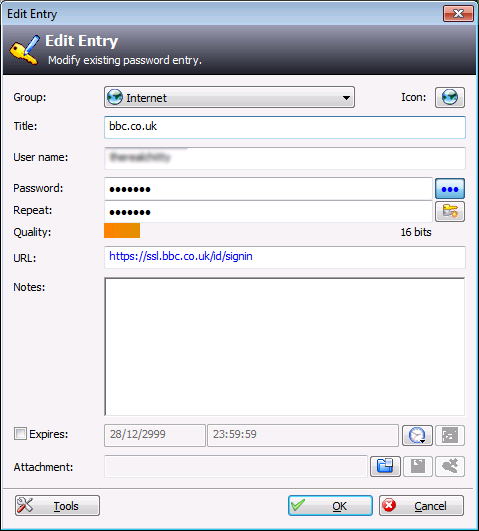
- Hit CTRL+ALT+K to bring the KeePass application window into focus.
- Select the bbc.co.uk entry and hit CTRL+U to open bbc.co.uk in your browser.
- Hit CTRL+ALT+K again to bring KeePass back into focus.
- Hit CTRL+V to Perform Auto-Type.
OK, there are 4 steps to this, but …
a) As you get advanced this becomes second nature, and
b) Is it any more effort than opening a URL, putting the mouse into the username screen, typing it out, then typing your easy-to-remember-password?
I'm just getting started with KeePass too, so there may be far better ways of accomplishing this.
Semi-Simple
Some websites don’t immediately play well with KeePass, so for these we need to invest a little more to get them working. Somewhat ironically my little website is one of them!
KeePass allows the Perform Auto-Type function for a website to be more specifically determined, so we’re going to do that.
- Hit CTRL+ALT+K to bring the KeePass application window into focus.
- Select the website (toepoke in this instance).
- Hit ENTER
- Select the Auto-Type tab
- In the Override default sequence field add the following: {TAB}{TAB}{TAB}{USERNAME}{TAB}{PASSWORD}{ENTER}
- Click OK to save.
This tweaks the behaviour of the Perform Auto-Type function. Evidently KeePass assumes (quite fairly) that the username field on the website is the first data entry field on screen. However on the toepoke login screen it’s field #3 (hence the 3 {TAB} references above)
With that small modification in place we can log into toepoke just as we did in the Simple steps above.
Hard
Some websites don’t play well with KeePass at all! For these we’re reduced to copying and pasting the credentials manually. KeePass has an approach for this too:
- Hit CTRL+ALT+K to bring the KeePass application window into focus.
- Select the website, and hit CTRL+U to open the website in your browser as normal
- Hit CTRL+ALT+K again to bring KeePass back into focus.
- Hit CTRL+B to copy the username to the clipboard
- Swap back to the website and hit CTRL+V to paste the username
- Swap back to KeePass (or hit CTRL+ALT+K)
- Hit CTRL+C to copy the password to the clipboard *
- Swap back to the website and hit CTRL+V to paste the password
- Hit the website login button
* KeePass has a nifty feature where the password is only kept in the clipboard for a set period of time. In the status bar, you'll see a countdown of how long you have left to paste it.

This timeout can be configured through Tools > Options > Security > Clipboard auto-clear time
Give Up (kind of)
And finally; Some websites don’t ask for a password to be entered at, merely a subset of the password. This approach is particularly popular with banking websites which present a series of dropdowns requesting say the 3rd, 5th and 8th letters of your password (to protect against key loggers).
For this scenario we can (and should) still use KeePass to store a strong generated password, but we can request KeePass to show us the password so we can discover the appropriate characters (naturally ensure nobody is looking over your shoulder at this point!)
- Hit CTRL+ALT+K to bring the KeePass application window into focus.
- Then either:
- Select the website of interest, then
- Hit ENTER to bring up the Edit dialog.
- Click the Hide password button (the 3 dots) to quickly show the password. OR
- Hit CTRL+H to toggle viewing passwords for all websites (in a section).
Conclusion
Whilst it’s great the Internet has become so ubiquitous, but as a consequence it’s got the attention of the baddies. I hope this article has made KeePass seem less scarey and encourages you to protect your online life.
If you find this useful, you might want to checkout my KeyPass on Android article too.